Screen shot capture and comparison tool for testing website changes.
- Install
- Example project
- Getting Started
- Examples
- Environment translations
- Custom report templates
- Difference Image Types
- Targets
- config file settings
- command line flags
- Flow
- Contribute
- License
npm install -g juxtaposer
npm install --save-dev juxtaposer
When installed for a single project, the binary is ./node_module/.bin/juxtaposer
There is a sample project in the repo. To run the sample app:
- Clone the repo.
- In the
examplefolder, runnpm install - Start the express server:
./bin/www - Run juxtaposer:
./node_modules/.bin/jux
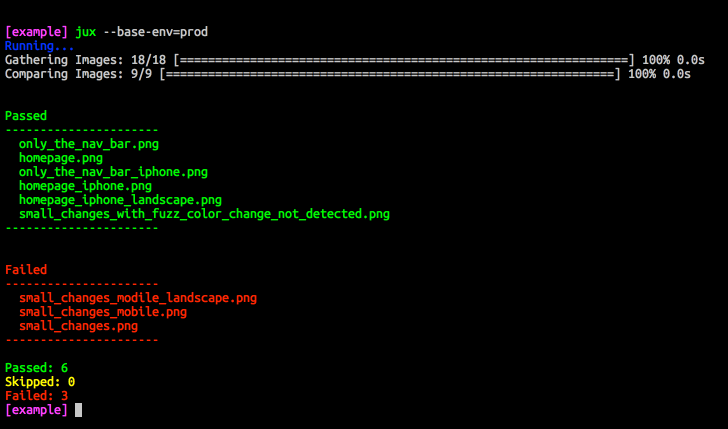
You should see output very similar to the image below:
If you run juxtaposer with the --report flag, you will see the html report:
Step 1 Make a file in the root of your project called juxtaposer.json with the contents:
{
  "imagesDir": "test_images",
  "substitutions": {
    "prod": {
      "query": "production"
    },
    "dev": {
      "query": "development"
    }
  }
}
Step 2 Make a file in the root of your project called targets.json with the contents:
[
  {
    "name": "sample_query.png",
    "url": "https://www.google.com/#q={{query}}"
  }
]
Step 3 Run juxtaposer --report
Step 4 Customize juxtaposer.json and targets.json
Create your config file:
{
  "imagesDir": "my_images",
  "substitutions": {
    "prod": {
      "subdomain": "www",
      "test_env": ""
    },
    "dev": {
      "subdomain": "testing",
      "test_env": "development."
    }
  }
}
Specify the targets:
[
  {
    "name": "photo_homepage.png",
    "url": "http://{{subdomain}}.{{test_env}}example.com/login"
  }
]
When you run the command $ juxtaposer, it will store the url http://www.example.com/login at my_images/baselines/photo_homepage.png and the url http://testing.development.example.com/login at my_images/samples/photo_homepage.png and then the two images are compared.
{
  "showReport": true,
  "export": true,
  "targetEnv": "staging",
  "baselineEnv": "production",
  "substitutions": {
    "production": {
      "subdomain": "www"
    },
    "staging": {
      "subdomain": "staging"
    }
  }
}[
{
"name": "excluding_two_regions.png",
"url": "http://{{subdomain}}.example.com",
"exclude": [ ".stats_section", "#user-info" ]
},
{
"name": "only_the_given_coordinates.png",
"url": "http://{{subdomain}}.example.com",
"only": [200, 0, 960, 50]
},
{
"name": "only_the_content_div.png",
"url": "http://{{subdomain}}.example.com",
"only": "#content"
},
{
"name": "narrow_view.png",
"url": "http://{{subdomain}}.example.com",
"width": 350
}
]The substitution values in the config file are used to build the url. It uses the swig template engine to build the urls. Example:
For the url http://{{subdomain}}.{{test_env}}example.com
And the substitutions:
"substitutions": {
  "prod": {
    "subdomain": "www",
    "test_env": ""
  },
  "qa": {
    "subdomain": "testing",
    "test_env": "qa."
  },
  "dev": {
    "subdomain": "testing",
    "test_env": "development."
  }
}
Will generate the following domains:
prod:http://www.example.comqa:http://testing.qa.example.comdev:http://testing.development.example.com
Note: test_env for both qa and dev in this example have trailing ..
You can specify your own report template for the html report using the command line flag --report-template or with reportTemplate in the config file. The report template is rendered with the swig template language
The following information will be passed to the template:
{
  "settings": {
    "ranAt": "Tue, 06 May 2014 03:23:28 GMT", // timestamp when the tests ran
    "isBaselineNeeded": false,                // true if the baseline images were captured on this run
    "baselineEnv": "prod",                    // baseline environment
    "targetEnv": "dev",                       // target environment
    "cwd": "/Users/user/code"                 // directory where the test ran
  },
  "tests":  {
    "failed":  [
      {
        "prettyName":     "home page",
        "imageName":      "home_page.png",
        "baselinePath":   "baselines/home_page.png",
        "samplePath":     "samples/home_page.png",
        "diffsPath":      "diffs/home_page.png",
        "compositeImage": "diffs/home_page.comp.png",
        "changesImage":   "diffs/home_page.changes.png",
        "animateImage":   "diffs/home_page.animated.gif"
      },
      {
        //...
      }
    ],
    "skipped": [
      {
        //...
      }
    ]
    "success": [
      {
        "prettyName":   "google homepage",
        "imageName":    "google_homepage.png",
        "baselinePath": "baselines/google_homepage.png",
        "samplePath":   "samples/google_homepage.png",
        "diffsPath":    "diffs/google_homepage.png"
      }
    ]
  }
}
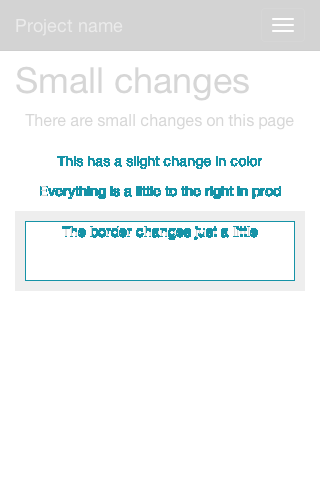
The changes pixels overlayed on the dimmed version of the baseline image.
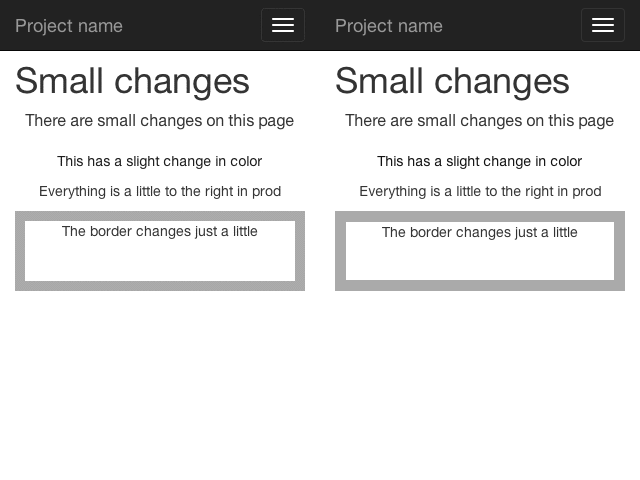
A gif that switches between the baseline and the sample image.
The negative view of the changed pixels.
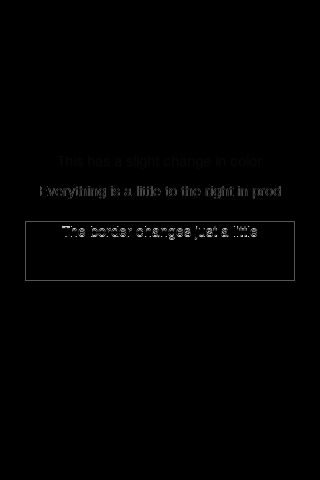
Only the changed pixels on a white background.
The targets.json file is a list of urls you want to compare. It's a json array of objects. Each target must have a url and a file name. Only the file name needs to be unique.
Required
Value: string
The url of the target.
Required
Value: string
the file name where the screen shot will be stored.
Value: integer
The width of the view port for rendering the page.
Value: string or array
If the value is a string, it is the css selector used to select the element to be captured. Only the first match will be used for the screenshot.
Uses the method querySelector
If the value is an array, it is the used as the coordinates of the screenshot region. The array must have 4 integer elements elements: [left, top, height width]
Value: array
An array of css selectors of regions to ignore. Any element that matches any of the css selectors will not be included in compairing the baseline to the sample image.
Warning Any match will be ignored. For example 'div' will ignore all divs on both pages.
Uses the method querySelectorAll
Value: integer
Default: 20
The percent of tolerance to allow between two images. A value of 100 will ignore all differences between the two. Only useful if the two pages contain similar images. More Info
Value: string
Default: dev
The environment information used to capture the sample images. Please see the substitutions config for more info.
Value: string
Default: prod
The environment information used to capture the baseline images. Please see the substitutions config for more info
Value boolean
Default false
If testOnly is true, it will skip the capturing of images and only compare images in the baselineDir with the images in the samplesDir. This is useful if you want to use your own scripts to capture the images.
Value boolean
Default false
Auto open the html report when run is completed. Only works on a mac for now.
Value string
Default N/A
The path relative from the current directory to the html file. The template language used is swig. See the custom template section below.
Value boolean
Default false
Create a zip file of the images captured and the html report.
Value: string
Default: jux-{{base_env}}-vs-{{sample_env}}-{{date}}.zip
The path and filename relative to the current working directory. The string is evaluated with the swig template language. The following values are passed passed into the path:
base_env: The name of the base env.sample_env: The name of the sample env.date: The timestamp of the test run in ISO format
Value: string
Default: test_images
The directory used to store all the images collected. It is resolved relative to the current working directory.
Value: string
Default: baselines
The folder for the baseline images. It is resolved relative to the imagesDir.
Value: string
Default: samples
The folder for the sample images. It is resolved relative to the imagesDir.
Value: string
Default: diffs
The folder for the diff images. It is resolved relative to the imagesDir.
Value: object
Default: an empty object
A key value pair of the environment names and the translation values. See the environment substitutions for more info.
Value string
Default: juxtaposer.json
Overrides the path used for loading the config file.
Value: string
Overrides: targetEnv
Value: string
Overrides: baselineEnv
Value: boolean
Overrides: testOnly
Value: boolean
Overrides: showReport
Value: string
Overrides: reportTemplate
Value: boolean
Overrides: export
Value: string
Overrides: exportPath
- Runs the prechecks
- checks to make sure imagemagick is installed
- ensures the directory structure is there
- checks to see if it needs to capture the baseline images
- Cleans up the directories
- This step can be skipped with the flag
--test-only - removes png's and gif's from
samplesDiranddiffsDir - If baseline images are going to to be captures, it removes png's from the
baselinesDir
- This step can be skipped with the flag
- Images are captured
- This step can be skipped with the flag
--test-only - the baseline images are only captured if the
baselinesDiris empty or the flag--base-env=SOME_VALUEis passed - The command
populateCmdwill be called for both the samples and the baseline images - For each target in the config file, it does the following:
- Sets the size of the viewport
- Captures the region if one is specified.
- Records the dimentions of excluded sections.
- Saves the image.
- This step can be skipped with the flag
- Images are tested.
- Every png in
baselinesDiris compared against the png of the same name insamplesDir - If a baseline images doesn't match the sample image, a series of images diffs are made in
diffsDir - If there is not a sample image for a baseline image, that image is marked as skipped
- Every png in
- Results are recored
- The results are displayed in the command line
- The html report is generated and saved at the path:
{{imagesDir}}/{{reportPath}} - The template for the html report can be changed with the flag
--report-template. The path will be relative form the working dir. - If the flag
--reportis passed, the html report will be opened with the command:open {{imagesDir}}/{{reportPath}}
- Results are exported in a zip file
- This step will only happen if the flag
--exportis used - The contents of
imagesDirwill be added to a zip file. - If you want to customize the path, you can specify a path relative to the working dir i.e.
--export-path=../archives/{{data}}.zip
- This step will only happen if the flag
Please do! Check out our Contributing guide.
MIT © 2014-2017 Shutterstock Images, Inc.


