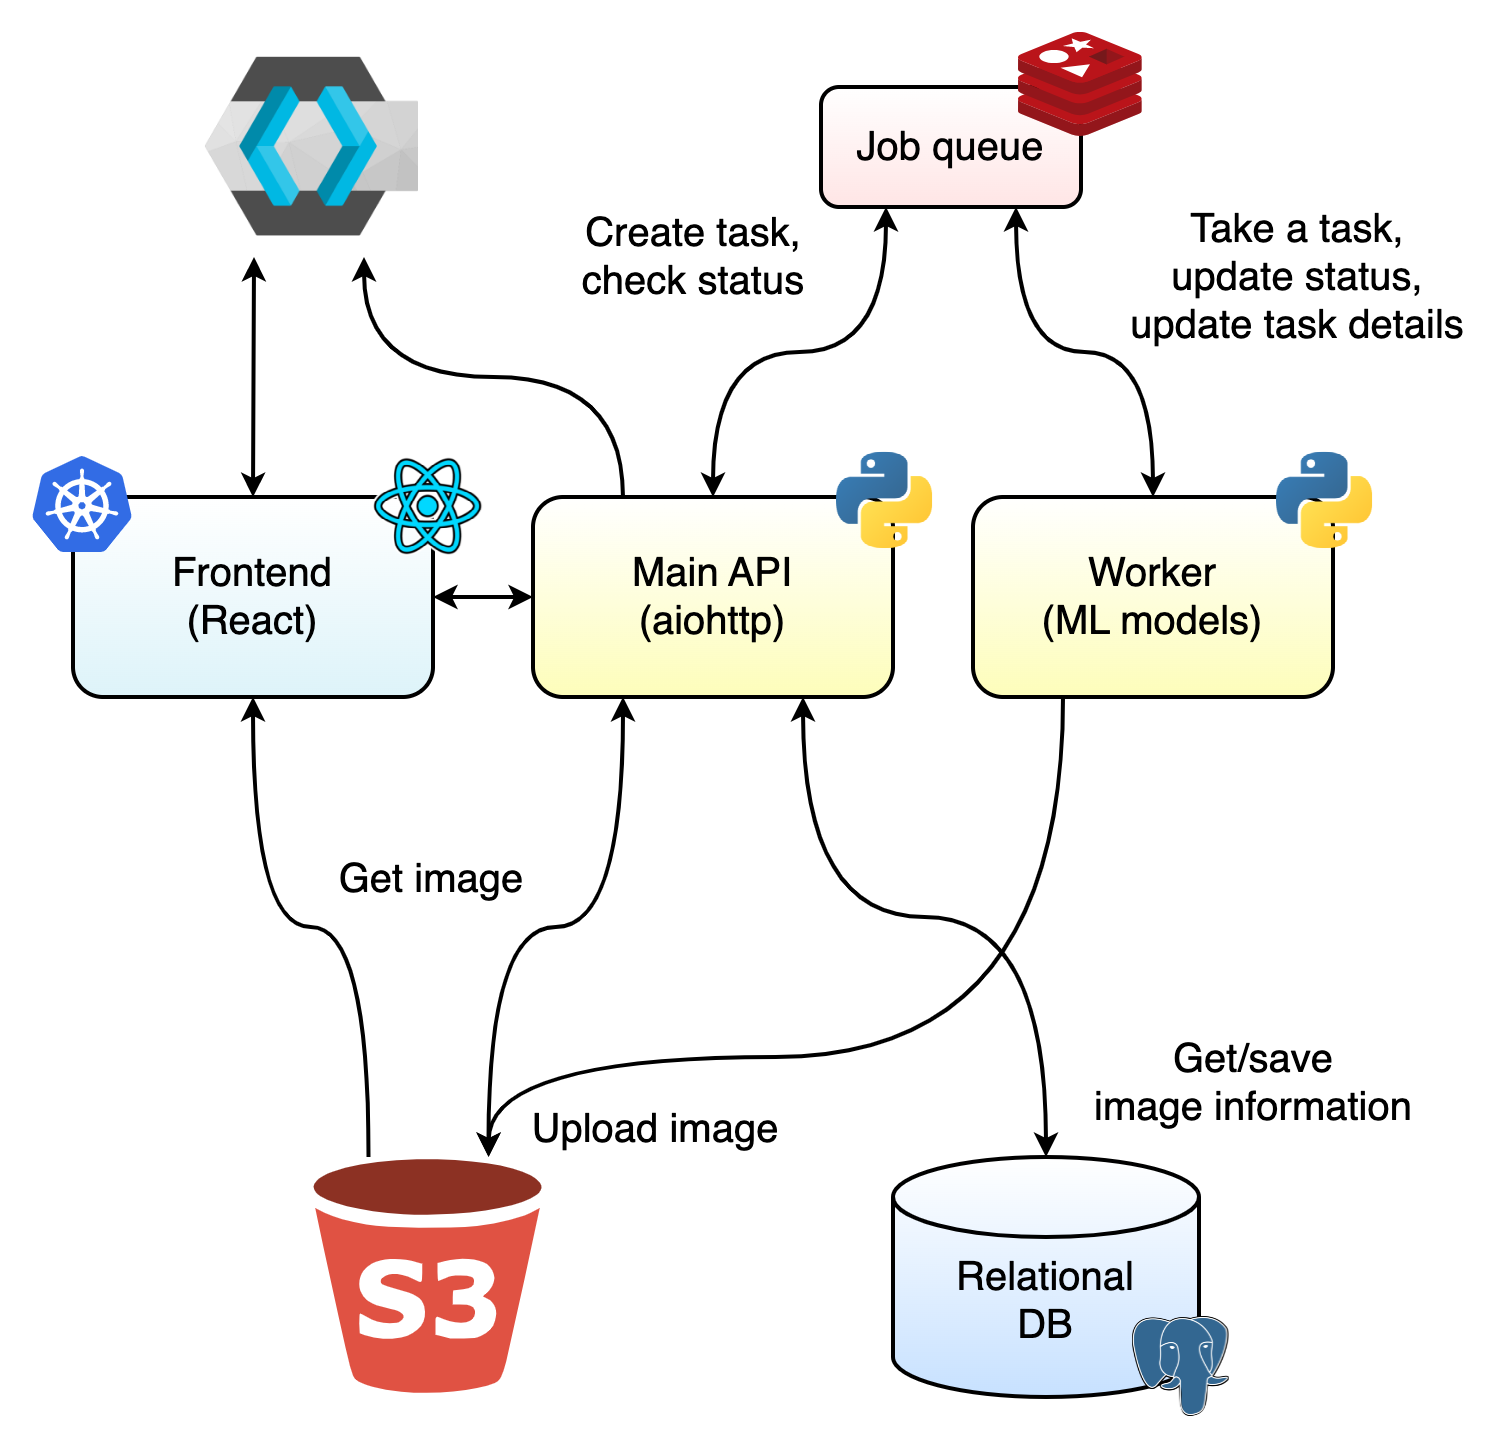
The current repository contains the source code for the Logo Wizard web service.
You can find the basic info about the app, this repository and its contents in the current document, for more detailed information about different parts and components of the app, please refer to READMEs inside folders.
The main folders are:
backend– backend source code, written in pythonfrontend– UI created with Reactlocal-dev– files and guides you will need to set up local development and testingops– Helm charts and encrypted values for the public Logo Wizard installation (which may or may not be available on any given day)
Before running tests or starting a local development server you will need to install dependencies, here is how you do it.
Go to the backend directory and run make local-dev – this will create a virtual environment in the repository root and install all backend dependencies and packages.
Activate the created virtual environment in a terminal before moving on to the next step.
Some heavy dependencies must be installed manually, also run:
pip install "openmim>=0.3.7"mim install mmocr
Some ML related libraries may not install this way, for example, there may be issues with installing xformers as a dependency on Mac, so feel free to comment it in setup.py when installing packages or building images.
You can now register the python interpreter in your IDE.
If you are using Pycharm, mark all second-level directories (e.g. app/logo_api, lib/logo_configs) as Sources Root to fix package imports.
A simple yarn install should be enough.
The easiest way to set up local development is described in the local-dev README.
It offers running external services (databases, Keycloak) and backend apps via docker-compose and setting up the UI via npm.
This allows one to run backend apps without bothering about python dependencies and relative paths too much and keep the ability to see UI changes in real time.
To run tests, follow these steps:
- go to the app folder (
backend/app/<app_name>) - run
docker-compose -f docker-compose.tests.yaml upto start required external services - all the tests are written using
pytestand are located inside thetestsfolder, so runpytestfrom the terminal (e.g.pytest --log-cli-level=INFO tests) on via the IDE
Install dependencies with yarn install or yarn install --frozen-lockfile.
Run yarn test inside the frontend directory to run all tests.
The frontend has its own simple Dockerfile, which requires several build arguments (such as the backend API url), installs dependencies inside the node image and bundles the UI into a nginx image.
The build of each backend app is separated into three images with the intention to speed up builds (but the image size is still a burning issue):
- The base-base image (
backend/Dockerfile.base), that is based on python:slim-buster. This image contains heavy dependencies, such as torch, opencv and mmocr, and is intended to be built very rarely only when new heavy dependencies appear. The version tag is specified insidebackend/base_img_version - The base image (
backend/Dockerfile), which installs all backend packages (that's right, all backend apps share the same image now). The version tag is alwayslatest - The app image (
backend/app/<app_name>/Dockerfile), which introduces an entrypoint. The version tag is specified inside thesetup.pyof the app.
